Thursday, November 29, 2012

Miss Doctor Who?

 I'm proud to say that this past year marked a lot of victories for me. One of which, converting my best friend into a Doctor Who fan. So much so, that she went as the 10th Doctor for Halloween this year.  We'll get to that in a minute. For now...Meet my friend Lauren. We go way back. She's an actor like myself only on the West coast. She's also one of those creative dorky types who when not insanely busy doing whatever it is people in L.A. do, makes things.

I'd love to give you some examples, but I have none. Because she's annoying and wont upload any old pic. That's my friend!
You can follow her here:
@LaurenOlipra
or Like her here:
Lauren Olipra Facebook Page

She's good people. Hell of an actress and comedian. Oh yeah, and I guess a good friend. (Lauren that was for you)

But she's also talented as a seamstress. This, what follows, was made by hand and from scratch. Well, almost scratch. She didn't weave the fabric herself. So I guess we can't be THAT impressed.


The Doctor's...Shorts? I tried to tell her these pants were too short. But would she listen to me? Oh no.

Next we have the suit jacket in a state of being pinned and sewn and other technical things.


The Doctor's trench coat. Which looks amazing. I believe this was done first and the other pieces after. Lauren will have to chime in here.


The Finished product! Miss Doctor Who! and our friend Justin as a Silence victim. Don't get me started on how this messes with time lines and the 10th Doctor didn't know about the Silence and how Justin should have been Rose. Just enjoy the finished costume.  Hopefully Lauren (ahem) will send more pics for me to post.


Tuesday, November 13, 2012

Flux Capacitor Part 1

Ladies and Gentlemen!

I've mentioned it, or hinted at it. Something. But now I'm actually taking on the challenge of building a mini Flux Capacitor. I mean who wouldn't want one of those just sitting there on their desk? You never know when you're going to need one. So I'm taking it upon myself to flood the world (or my desk) with the power of the the Delorean.

Reference photos have actually been difficult to find. Not because they're scarce, but because there are so many. They Flux Capacitor (from here on known as "FC") changed a little in each film and then of course again in all the replicas being built both privately and licensed.

But here is a pretty good photo just to get some basic ideas from:

This is one of the do it yourself kind. Love this kind! Doc Brown wouldn't have it any other way.

Now begins my attempt at making a smaller version of this amazing piece of technology.

Dimensions were taking from the actual electrical box that it's housed in and just shrunk down. As far as my projects go, this one is the easiest to get measurements for because the things actually exist.

Pretty straight forward rectangle with sides ready to be assembled


I cut out the viewing port and will eventually cover this with a thin piece of plastic. 


There are no innards yet.  There is no nothing yet. Just a frame. A weird picture frame.

PRIMER!

For now this is it. As of posting these pictures I've moved on to step two which is to the the actually working pieces of the FL lit and properly aligned.  If I can I'll try to get some pics ready for upload tomorrow just so you can all see the magic of the light. oooh. Ahhh.

I know there isn't much here, but it's a start. It's very boxy. Once the FL has more structure I can start to round out the corners. While it is an electric box, it's not a perfect rectangle. That baby's got curves!


Saturday, September 15, 2012

Iron Man's Chest Arc Reactor 2

Part 2! I'm not too great with smaller posts with a little bit of progress. It's more like SURPRISE!  A huge jump ahead in construction.  Over the past couple of weeks since the last post I've had a fair amount of building time, so a lot has gotten done. As of writing this it's almost 100% done. The only thing I'm left to do is a little bit of black paint for trim.

As you'll see it's not 100% movie accurate. It's not made out of steel. I'm also certain it's a bit too big. But I don't care. The color scheme is not perfect either. But this is designed to be worn under a shirt, not to be displayed in a glass case on my desk as some ironic joke from Pepper Potts.

So away we go!
Alright.  What we have here is the front piece that will go on over the plastic diffuser.  You'll see.  This will help hide a few little imperfections and keep the plastic disc on.

The beginning of the electronics.  For the middle blue section I've got 3 blue LED's aimed to illuminate the outside sections of the triangle.

And here you can see the white LED's now interspersed among the blue. Luckily the throw of the LED's doesn't bleed too much. So there is a definitely distinction between the blue and the white.

This is pretty simple...It's the back plate that  will be attached at the end. 

Here is the sides painted grey and the first layer of the top part. The top part is made up of the piece you see here, the plastic disc acting as a diffuser, and then the frame in the first pic.

Just another angle.

Here is the piece assembled with just the BLUE LED's on. But you get an idea of what the top frame does for the look of it. 

And of course...our wii-mote as a stand while things dry.  Pretty sure I'll be in trouble for that.


And here it is! Almost done. But the pieces are all together except the back and the batter pack needs to be attached.  (Which as of posting...it is. You'll see!)

Wednesday, August 29, 2012

Iron Man's Chest Arc Reactor 1

I'm stretching my modelling muscles some more and taking on a few small projects at once. The first up is Iron Man's chest piece. I'm looking specifically at the one from Iron Man 2 and the Avengers. The one with the triangle in the center.  And now it's time for a screen grab...

Bam, you've been Iron Manned!


So that's whats going on today in the workshop...err...living room floor. It's going to run off of 2 double batteries. The switch and power supply will be one small hand held piece that can slip in a pocket or where ever and easily be turned on and off.

To start. I scoured the web for dimensions. They were actually pretty difficult to come by for some reason. You'd think Stark would have leaked his plans all over. I managed to get some basic dimensions off of one of the collectible chest pieces out there. Some site, some where had it posted. So I was able to build off of that.

I also found this image from one of the DIY sites.
I will happily give credit to the creator of this image if I could only find out  who made it. If you have stumbled upon this blog let me know and I'll credit the hell out of it.


I reworked this a bit to fit the dimensions I found and used it as a stencil to start cutting out better guides.


From paper to cardboard so that I've got a fairly sturdy yet rough piece with which to cut out the actual layers out of wood. Which of course is the next step.

The final chest piece is going to be comprised of a series of layers. A few layers of wood with a layer or two of plastic in order to get the proper glow.  It's meant to be worn under a shirt. So I don't have to get too detailed. but of course I'm going to do my best to get it as close as I can. The following images are of the wood cut outs. Being that it's meant to be worn under a shirt it can't be too thick. So it's hard to judge the size of it in these following images, but it's going to be roughly 1/2 an inch thick. Less if I can manage it with all the wiring and lighting.


Once I got it to a shape and smootheness that I was happy with I decided to see what it would be like with lights. Just a test. The following image or two is literally all taped together. The LED is soldered directly to the power source. No switch yet. And the frame, light, and diffuser are all taped together.  You'll see.


And there we have it folks. The beginnings of my ARC reactor chest piece. I hope you enjoyed stage 1!

Tuesday, August 14, 2012

TARDIS 5

We're getting down to the end here. These next few progress pictures show the innards and all the messy wiring that eventually got cleaned up. In total there are 13 high intensity LED's throughout the Tardis to illuminate all the necessary sections. One for each window, one for each "Police Public Call Box" sign, and of course one for the main light on top. And as you can see more and more of the Blue is coming together. At this point in the build it's just a matter of adding the finishing touches and hoping to not run the paint.


 First up we have the walls slowly being assembled and fitted with their LED's. Laying down next to the walls you can see the frame painted blue. I painted the walls in 2 parts. The frame, then the main back piece. Then I attached them together. I could have painted them as one big piece, but I feel like there is more depth this way when looking at them and better fill with the paint.

 Here is the frame just resting in place so you can get a better idea of how I assembled them and painted in sections.

 This piece took me a while to figure out how to do. The dimensions are so small that this was proving problematic. In the end I chose to carve out the inside of a block of wood as opposed to making tiny 4 sided boxes. More strength this way.

 
The "Police Public Call Box" sign is simply a print out of the graphic and glued to the back of a clear piece of plastic. It gives it a weathered look when not lit. And when lit it allows the light to pass through the white lettering.


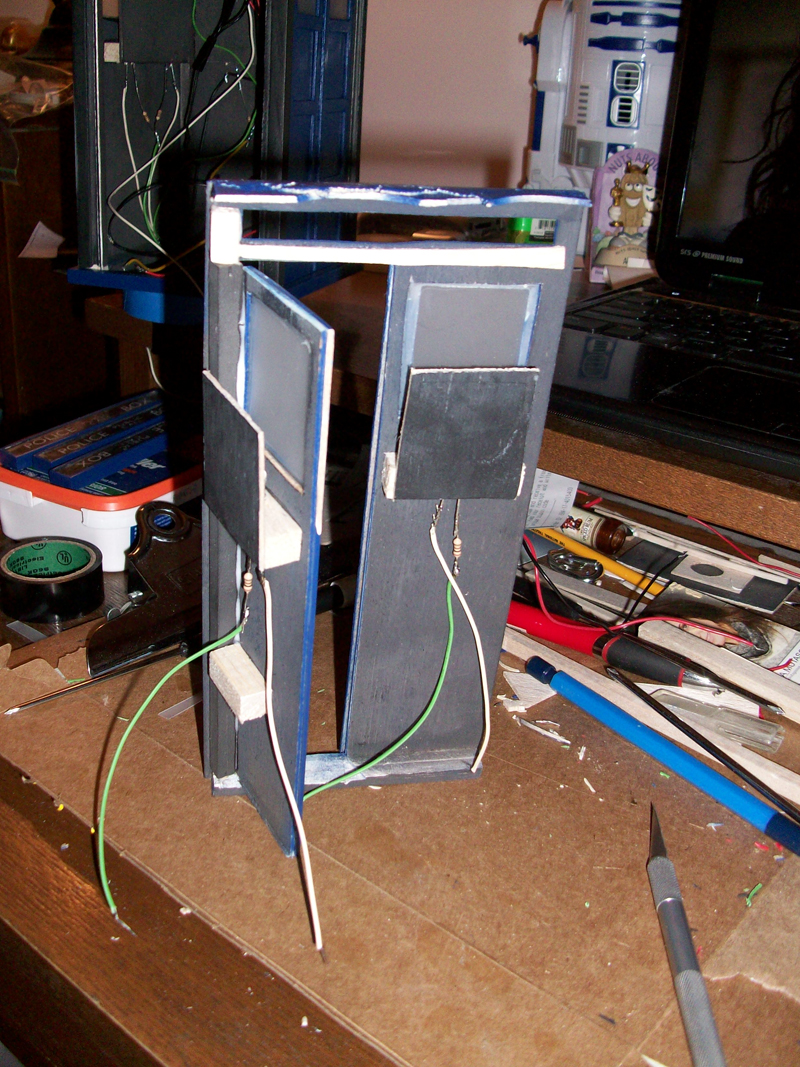
 Here is a reverse view of the door with the LED's affixed to the back of it. I put in black squares to help direct the light and bounce as much of it up and out. The intention is to get the least amount of bleed through the seem of the door.


 And here are the innards! From a birds eye view. It sure looks messy in there.  I'll be able to clean up a fair amount but what can you do. It's wirey. Also, for some reason this gives the impression that the top of the tardis has a curve to it. It doesn't. I think the end caps make it look slightly curved, but they still need to be sanded down on the bottoms in order to make the top fit flush with the rest of it.


Here you can see the intense light that shines through the call boxes.  LED's don't really spread their light much. Or if they do I haven't found those yet. So thankfully the plastic I use on the face of the boxes diffuses it enough.


Roughly put together. This is right before the window panes were put in. 

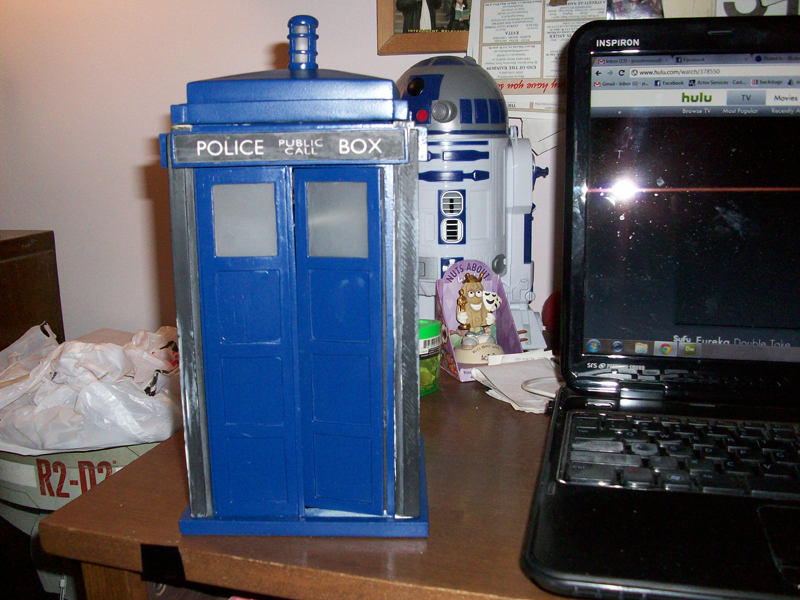
Here is the whole thing almost complete. All that is left is to paint the four posts and sure up the wiring and the switch to turn it on and off. But you get a very good idea of how the final product will look. For now I've chosen not to put frames in the windows. They're extremely thin on this scale. If anything I might tape out and paint them on. but as it stands the final Tardis will be without frames in the windows.

And at night!


Monday, August 06, 2012

TARDIS 4

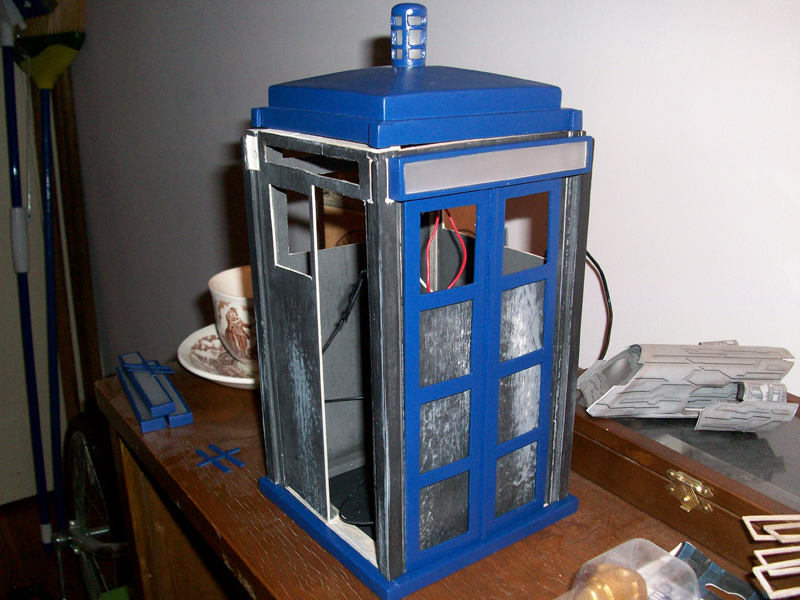
Here is a little bit more of the Tardis. I've done some work to it as you can see. The electrical system is starting to go in as you can see along with some of the detailed sections. I also have a habit (good or bad you decide) of placing pieces together that aren't ready to go together yet. Oh well.  I like to see how it's going to look, you know?


So first up is the roof with the LED in place ready for the lamp cover.


I've got some spacers in there to help keep the LED high enough so that it's centered in the lamp.


Here we have the lamp in place along with the light fixture that will illuminate the Police Public Call Box signs on the sides of the roof section.  That'll go right up underneath this section and hopefully give a nice glow to those signs.  I expect a lot of wire mucking it all up. Woohoo!
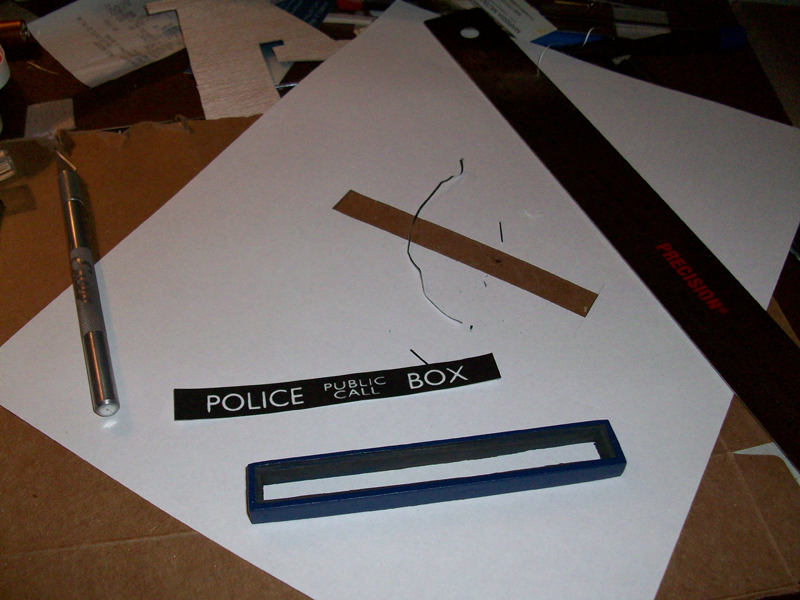
Speaking of those signs. Here are the frames for the signs being painted.


 Just a side view.

Here is one of the walls and the primed sign frame. This is a bit out of order. I just wanted to point out those 4 really thin rectangles were originally going to be part of those public call boxes. Realized they were a fragile waste of time. Scrapped!

 The base of the walls being put together. You learn a lot your first time through. I made the door frames a little too short and then had to add pieces to fill in the gap.  Ooops

 And here are two more pictures of it just resting together. Nothing is truly set yet save for the roof section. The rest is all gently balanced so as not to come crashing down. Really, this is a horrible habit of mine to test fit things so loosely.


More to come. Possibly tonight or tomorrow. I have done a lot of work on this over the past 2 weeks but there were just too many pictures for just one post.