Wednesday, August 29, 2012

Iron Man's Chest Arc Reactor 1

I'm stretching my modelling muscles some more and taking on a few small projects at once. The first up is Iron Man's chest piece. I'm looking specifically at the one from Iron Man 2 and the Avengers. The one with the triangle in the center.  And now it's time for a screen grab...

Bam, you've been Iron Manned!


So that's whats going on today in the workshop...err...living room floor. It's going to run off of 2 double batteries. The switch and power supply will be one small hand held piece that can slip in a pocket or where ever and easily be turned on and off.

To start. I scoured the web for dimensions. They were actually pretty difficult to come by for some reason. You'd think Stark would have leaked his plans all over. I managed to get some basic dimensions off of one of the collectible chest pieces out there. Some site, some where had it posted. So I was able to build off of that.

I also found this image from one of the DIY sites.
I will happily give credit to the creator of this image if I could only find out  who made it. If you have stumbled upon this blog let me know and I'll credit the hell out of it.


I reworked this a bit to fit the dimensions I found and used it as a stencil to start cutting out better guides.


From paper to cardboard so that I've got a fairly sturdy yet rough piece with which to cut out the actual layers out of wood. Which of course is the next step.

The final chest piece is going to be comprised of a series of layers. A few layers of wood with a layer or two of plastic in order to get the proper glow.  It's meant to be worn under a shirt. So I don't have to get too detailed. but of course I'm going to do my best to get it as close as I can. The following images are of the wood cut outs. Being that it's meant to be worn under a shirt it can't be too thick. So it's hard to judge the size of it in these following images, but it's going to be roughly 1/2 an inch thick. Less if I can manage it with all the wiring and lighting.


Once I got it to a shape and smootheness that I was happy with I decided to see what it would be like with lights. Just a test. The following image or two is literally all taped together. The LED is soldered directly to the power source. No switch yet. And the frame, light, and diffuser are all taped together.  You'll see.


And there we have it folks. The beginnings of my ARC reactor chest piece. I hope you enjoyed stage 1!

Tuesday, August 14, 2012

TARDIS 5

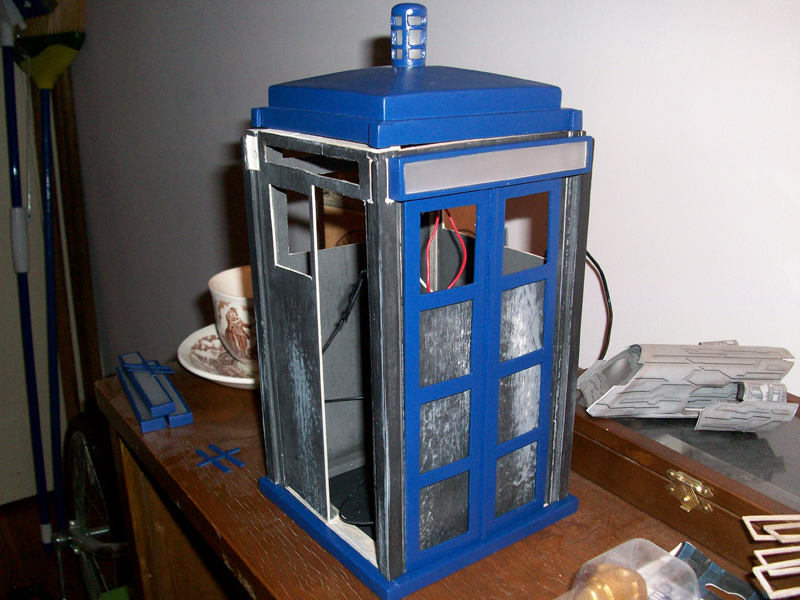
We're getting down to the end here. These next few progress pictures show the innards and all the messy wiring that eventually got cleaned up. In total there are 13 high intensity LED's throughout the Tardis to illuminate all the necessary sections. One for each window, one for each "Police Public Call Box" sign, and of course one for the main light on top. And as you can see more and more of the Blue is coming together. At this point in the build it's just a matter of adding the finishing touches and hoping to not run the paint.


 First up we have the walls slowly being assembled and fitted with their LED's. Laying down next to the walls you can see the frame painted blue. I painted the walls in 2 parts. The frame, then the main back piece. Then I attached them together. I could have painted them as one big piece, but I feel like there is more depth this way when looking at them and better fill with the paint.

 Here is the frame just resting in place so you can get a better idea of how I assembled them and painted in sections.

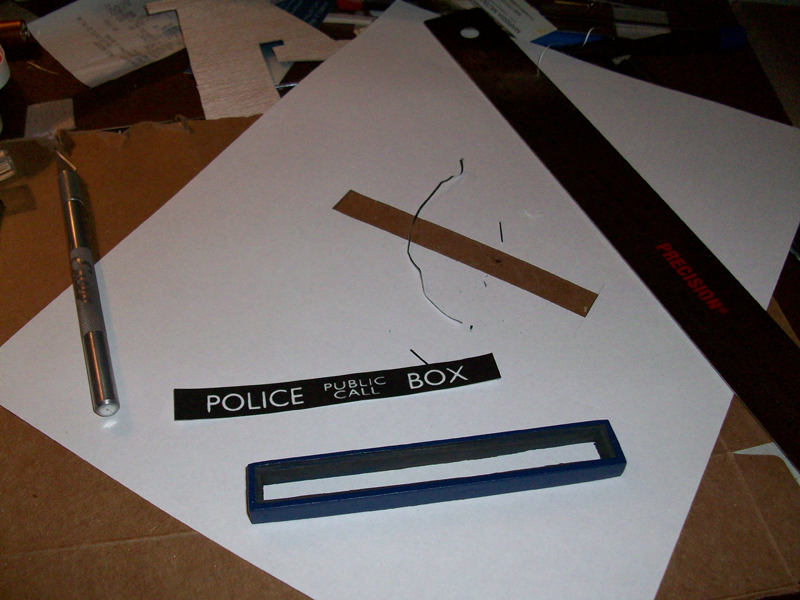
 This piece took me a while to figure out how to do. The dimensions are so small that this was proving problematic. In the end I chose to carve out the inside of a block of wood as opposed to making tiny 4 sided boxes. More strength this way.

 
The "Police Public Call Box" sign is simply a print out of the graphic and glued to the back of a clear piece of plastic. It gives it a weathered look when not lit. And when lit it allows the light to pass through the white lettering.


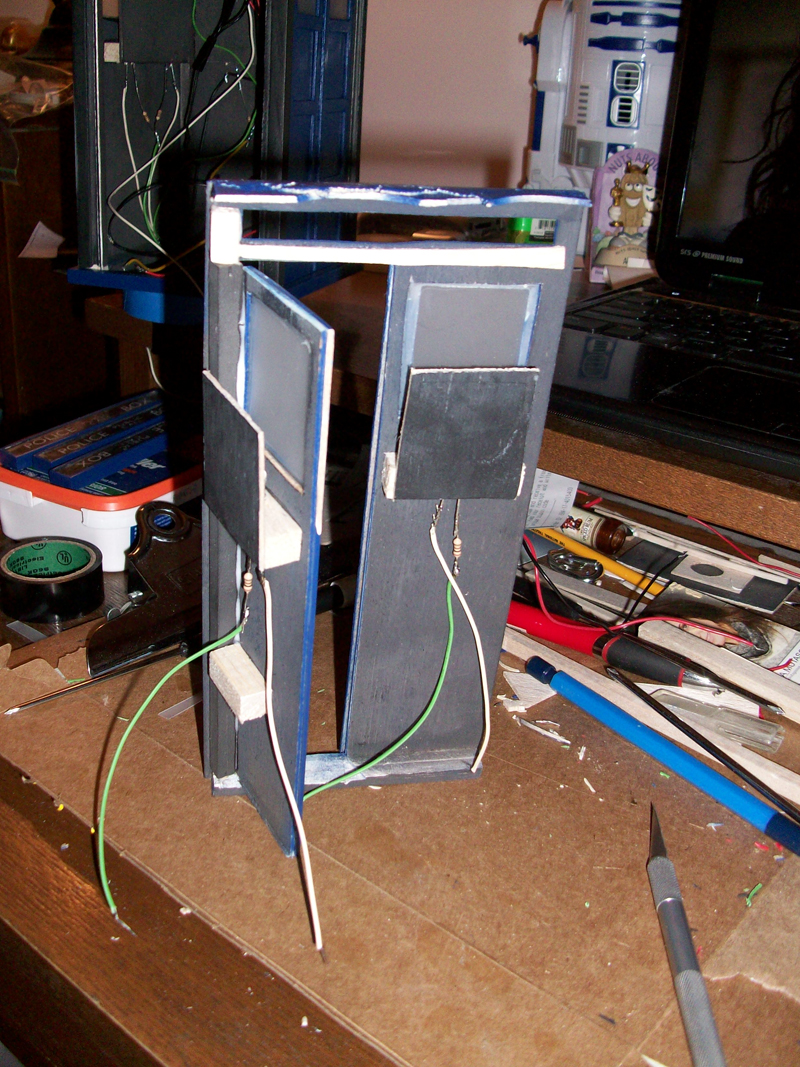
 Here is a reverse view of the door with the LED's affixed to the back of it. I put in black squares to help direct the light and bounce as much of it up and out. The intention is to get the least amount of bleed through the seem of the door.


 And here are the innards! From a birds eye view. It sure looks messy in there.  I'll be able to clean up a fair amount but what can you do. It's wirey. Also, for some reason this gives the impression that the top of the tardis has a curve to it. It doesn't. I think the end caps make it look slightly curved, but they still need to be sanded down on the bottoms in order to make the top fit flush with the rest of it.


Here you can see the intense light that shines through the call boxes.  LED's don't really spread their light much. Or if they do I haven't found those yet. So thankfully the plastic I use on the face of the boxes diffuses it enough.


Roughly put together. This is right before the window panes were put in. 

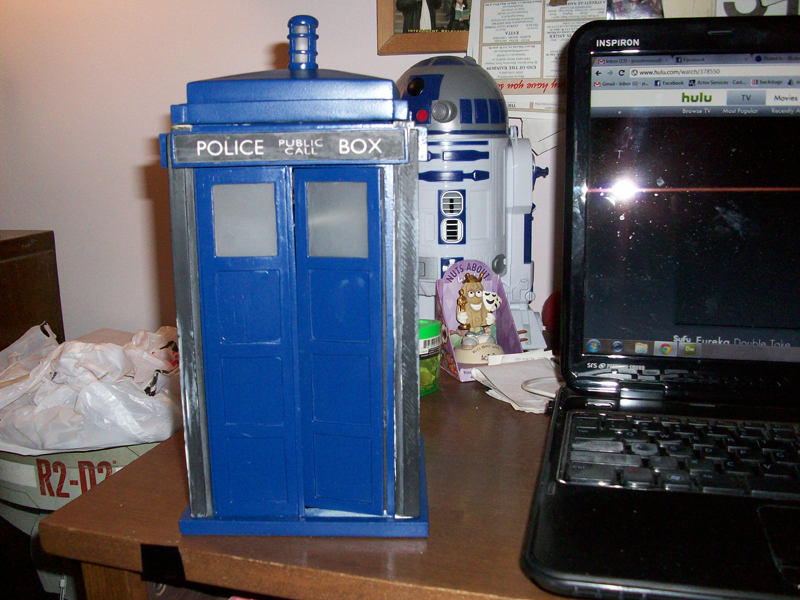
Here is the whole thing almost complete. All that is left is to paint the four posts and sure up the wiring and the switch to turn it on and off. But you get a very good idea of how the final product will look. For now I've chosen not to put frames in the windows. They're extremely thin on this scale. If anything I might tape out and paint them on. but as it stands the final Tardis will be without frames in the windows.

And at night!


Monday, August 06, 2012

TARDIS 4

Here is a little bit more of the Tardis. I've done some work to it as you can see. The electrical system is starting to go in as you can see along with some of the detailed sections. I also have a habit (good or bad you decide) of placing pieces together that aren't ready to go together yet. Oh well.  I like to see how it's going to look, you know?


So first up is the roof with the LED in place ready for the lamp cover.


I've got some spacers in there to help keep the LED high enough so that it's centered in the lamp.


Here we have the lamp in place along with the light fixture that will illuminate the Police Public Call Box signs on the sides of the roof section.  That'll go right up underneath this section and hopefully give a nice glow to those signs.  I expect a lot of wire mucking it all up. Woohoo!

Speaking of those signs. Here are the frames for the signs being painted.


 Just a side view.

Here is one of the walls and the primed sign frame. This is a bit out of order. I just wanted to point out those 4 really thin rectangles were originally going to be part of those public call boxes. Realized they were a fragile waste of time. Scrapped!

 The base of the walls being put together. You learn a lot your first time through. I made the door frames a little too short and then had to add pieces to fill in the gap.  Ooops

 And here are two more pictures of it just resting together. Nothing is truly set yet save for the roof section. The rest is all gently balanced so as not to come crashing down. Really, this is a horrible habit of mine to test fit things so loosely.


More to come. Possibly tonight or tomorrow. I have done a lot of work on this over the past 2 weeks but there were just too many pictures for just one post.

Saturday, July 14, 2012

TARDIS 3

So there has been A LOT of work done since I last posted.  I lot more detail work and I've slowly started to make her blue...again.  We'll just dive in and discuss, shall we?

The following are pictures of the roof. Essentially it's just like the  base only with the tapered top. So I built with a very crude skeleton inside in order to give it some strength,


Lots of putty and filler later...

And we have the makings of a nice smooth roof piece just itching to have a light on top of it.


I've gotten in the habit of piecing things together before they are ready. but I can't help it I like seeing what things will look like.  And I think it's a good way to see if you're on the right track. Especially when scratch building.  So here is the Tardis with the roof just resting.


Some how I missed photographing the sides and the corner pieces.  But they're also, clearly...made. The sides actually slide into grooves cut into the corner pieces. I do at least have a close up of the top corner detail before paint


Moving on to the light at the top of the Tardis. This is the base and the top of the light structure.


I built is one level at a time. This pic it appears to be leaning, but that's been fixed.  There was some non dried glue going on in this picture.


Of course...testing the lamp on the roof piece...


 BLUE!

The frame had to be painted before putting the plastic piece inside that will diffuse the light. There is just no space to tape anything out with this small piece.


With the frosted piece of plastic inside the light to help diffuse the LED and allow more of a glow.


Here is the  base of the Tardis taped out and painted blue.


And more test fitting. Here is with one set of windows cut open in prep for the mini light boxes that will illuminate the windows.


And the top piece now blue and with the filler panel on top.


So that's where I am right now. If this weekend opens up as much as I hope it will I should be able to get a lot more done. We'll find out tomorrow if I have to sand down the blue again. There is some minor dimpling probably from oil from my hands, or some water that hadn't dried yet before I started painting.  Great.